Tim-Oliver Husser
Institut für Astrophysik Göttingen
husser@astro.physik.uni-goettingen.de
Claude
An Automation Tool for the Monet Telescopes
Manual
(March 10, 2024)
![[Uncaptioned image]](/html/1102.5410/assets/gfx/monet_milkyway.jpg)
platzhalter
| Image: Stephen Potter, SAAO, 2008 |
Chapter 1 Introduction
1.1 Monet
MONET (MOnitoring NEtwork of Telescopes) is a telescope project of the Georg-August-Universität Göttingen, the University of Texas at Austin and the South African Astronomical Observatory (SAAO). Two identical telescopes have been placed at the McDonald Observatory (2005) in Texas, and at the SAAO site (2008) in Sutherland, South Africa.
The telescopes have been funded by the Alfried Krupp von Bohlen und Halbach-Stiftung111http://www.krupp-stiftung.de/ and built by Halfmann Teleskoptechnik222http://www.halfmann-teleskoptechnik.com/.
While 50 per cent of the observation time is used for science observations by the three partners, the rest of the time is dedicated to be used by schools for the education of their students. This is made possible by a piece of software that allows the observer to fully control the telescope over the internet via a simple web browser. Due to the time shift between the telescope and potential observers, e.g. students in Germany can use the telescope in Texas during normal school hours, while it is still night there.
Furthermore the locations of the two telescopes allow us to cover the whole sky, i.e. every bright enough object in the universe is observable by the Monet telescopes. Also it is possible to start the observation of objects near the cellestial equator in South Africa until sunrise and then continue using the telescope in Texas.
The Monet telescopes were designed to work in a robotic mode, i.e. without any observer interaction. A list objects to be observed would then be sent to the telescope and everything would be done automatically. Unfortunately that mode is not available yet.
1.2 The Monet portal & Claude
The Monet portal is a web page that allows logged in users to control the Monet telescopes. The telescope can be moved to any coordinates accessible from the telescope’s position and pictures can be taken, both using a simple user interface.
While this is completely adequate for simple observations and helps getting students at schools working with the telescopes, especially professional astronomers are missing some more advanced functionality. I.e. focussing the telscope is a task that can be automated quite easily, but with using only the Monet portal it means subsequently changing the focus value and taking a picture. And in the end the observer has to fit the data manually to get the best focus. Claude has been designed to help with this and in general automate standard procedures as good as possible.
Claude is not a replacement but more like an extension of the portal. Basically it has a web browser built in, which does nothing else than displaying the Monet portal. But due to this, Claude is able to use the portal as a normal user would, i.e. fill in forms and click on buttons. This allows for some quite advanced automating of the Monet telescopes.
Furthermore Claude tries to cover everything an observer needs to know about the telescopes, i.e. it shows a list of recent images (and offers to download them), shows weather informations and automatically fills in a night log for the observer.
At the moment Claude is only used internally at the Institut für Astrophysik Göttingen, but at some point we are planning to make it public, so that it can be used by every Monet observer, especially schools.
Chapter 2 Using Claude
2.1 First start
When Claude is started for the first time, the options dialog (see chapter 8) is shown. The only option that really needs to be set now is the Claude dir. Claude will not start without this being set properly.
2.2 Wrapping the Monet portal

After starting Claude the first thing one sees is a world map (see fig. 2.1) with three buttons on it for Monet/North in Texas, Monet/South in South Africa and the Monet Simulator. The bright and dark areas on the map depict the current day/night distribution on earth, so you can always check which of the telescopes should see some stars above. The earth at night is composed of a NASA image111http://visibleearth.nasa.gov/view_rec.php?id=11793, while the daylight image is provided by Tor Øra222http://www.oera.net/How2/TextureMaps.htm.
The world map also presents the actual cloud coverage currently measured on Earth and is updated every thirty minutes. The current cloud map is taken from the Xplanet project 333http://xplanet.sourceforge.net/.
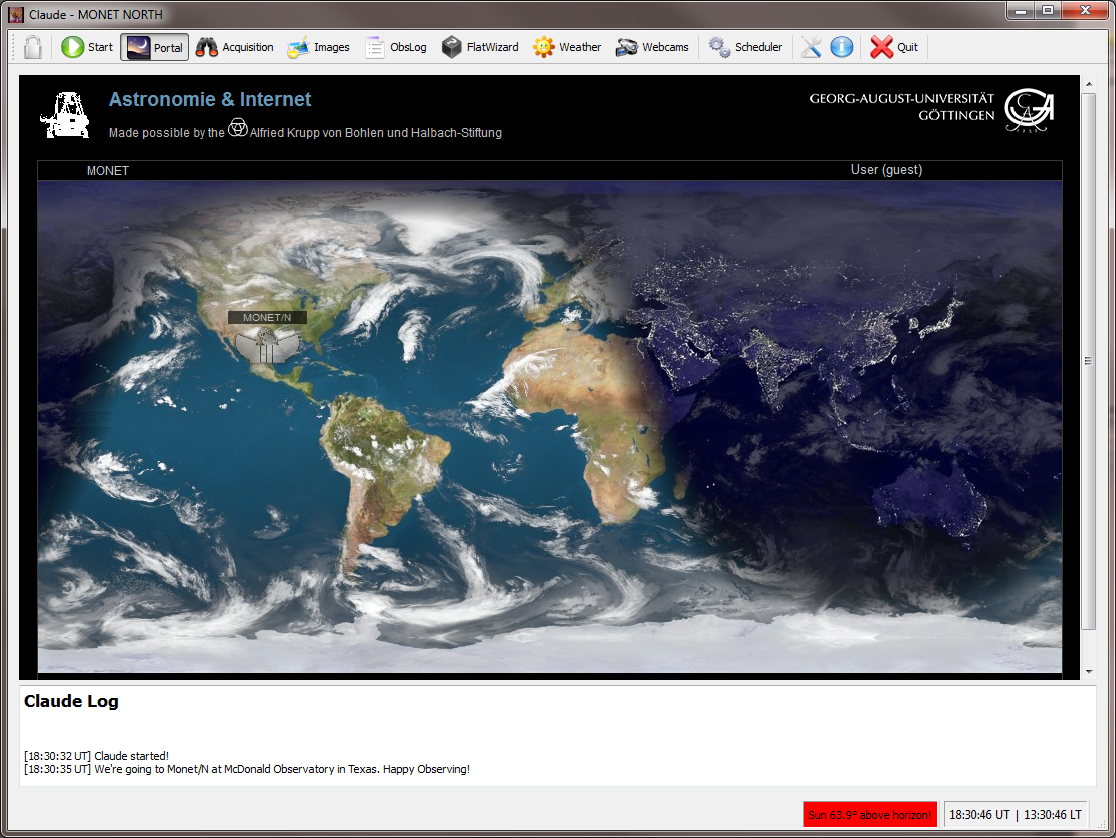
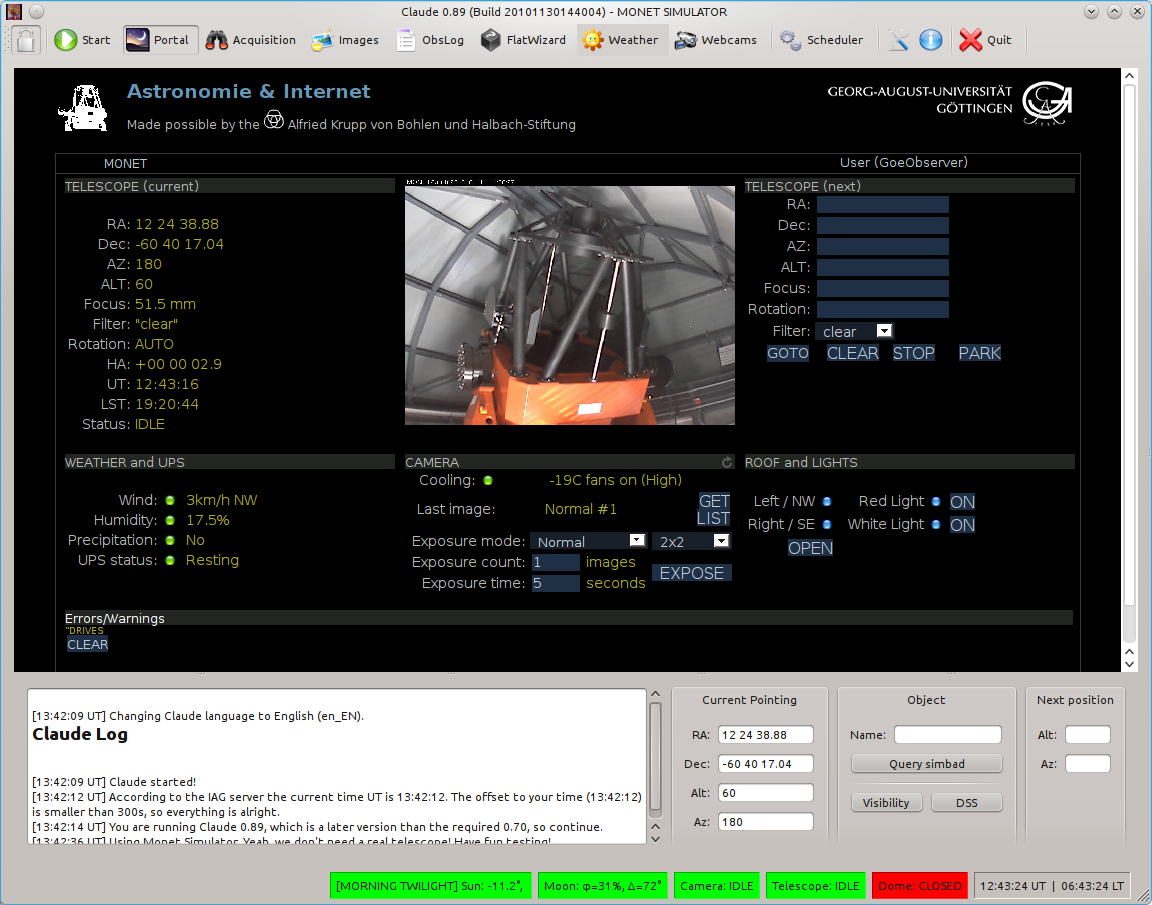
To use any of the Monet telescopes or the Simulator, you have to click on the corresponding button. Claude now loads the actual Monet portal and displays it. From now on you can use the portal the same way you would if you were not using Claude. All the links and button work (more or less) the same and therefore you can operate the telescope and take pictures without using any of the advanced features of Claude. See fig. 2.2 for some examples of how the portal is displayed within Claude.
2.3 Features added to the portal
Although the last paragraph stated that the portal as shown inside Claude behaves the same way as the portal used within a usual web browser, there are some changes that will be described her.
2.3.1 Safety precautions
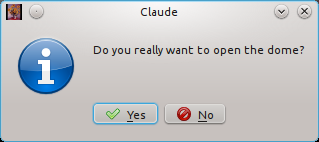

Usually when first logging in into the portal and starting an observation, there are two very important buttons: ON and OPEN. The first one initializes the telescope while the latter one opens the dome. Unfortunately there is absolutely no safety check implemented in the portal, so you can always click one of this buttons, even if it is still daylight time and you are facing the risk of exposing the main mirror to the sun. To prevent this, Claude asks you for confirmation, before anything is done. Even during the night a message box is shown, while during the day a second message box warns you even more explicitly (see fig. 2.3).
Furthermore Claude will never allow you to move the telescope below 15 degrees altitude.
2.3.2 Automatically logging out
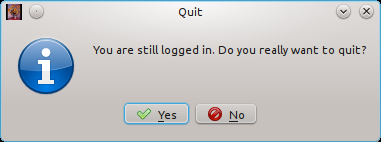
A very common problem with the Monet portal is closing the web browser with the portal by accident. In this case you cannot login to the portal for some time. Claude tries to prevent this by automatically logging out users on quit. So whenever you have finished your observations and closed down the telescope, just quit Claude, confirm the message box (see fig. 2.4) and you are logged out automatically!
2.4 The status section

Probably the most obvious feature added to the portal is the status section on the bottom of the window (see fig.2.5).
2.4.1 Action log
On the left there is an action log, where Claude prints some information about what it is currently doing. The log is automatically stored on disk in the Claude directory that you specified in the options dialog (see chapter 8). There is one file for every night (from noon to noon) with a filename that contains the date of the starting day, e.g. ClaudeLog_2010_09_03.log.
2.4.2 Current pointing
On its right-hand side the box titled Current pointing shows the current position of the telescope. Both RA/Dec and Alt/Az are shown and updated regularly. Next to it on the right is the box Next position. Whenever you enter valid RA/Dec coordinates in the ’TELESCOPE (next)’ form of the portal, the corresponding Alt/Az position is calculated and displayed here. Therefore you can always see how high above the horizon (or if!) a target stands before the telescope is moved.
2.4.3 Object
The remaining box Object was added in order to help you getting your observation started. If you enter a valid name of an astronomical object, its coordinates are retrieved from Simbad 444http://simbad.u-strasbg.fr/simbad/ and filled into the TELESCOPE (next) form of the portal.

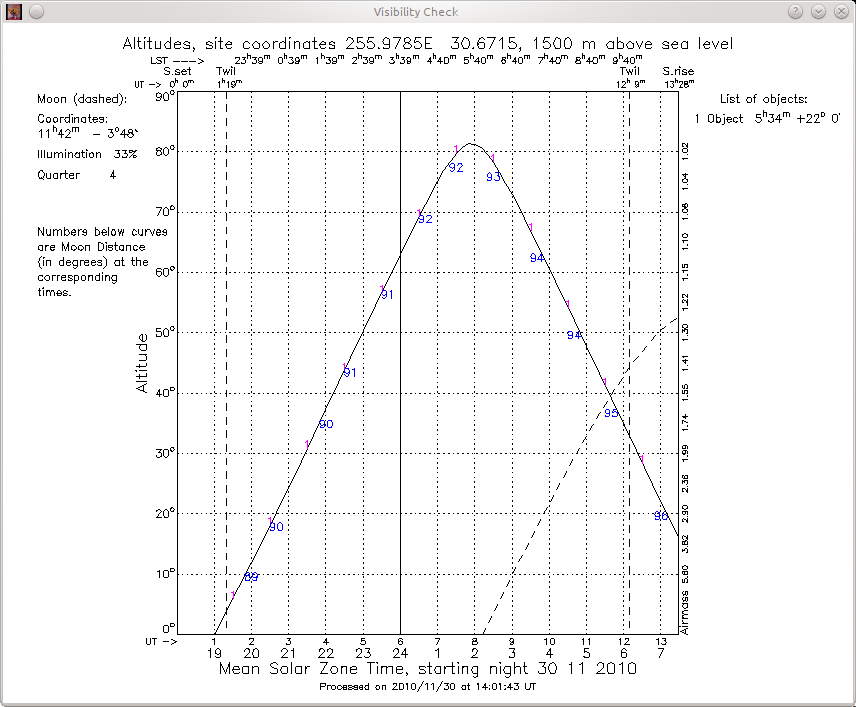
For seeing a visibility chart for the current target you can click on Visibility. The graph is downloaded from the Isaac Newton Group of Telescopes555http://catserver.ing.iac.es/staralt/index.php and displayed in its own window (see fig.2.7(a)). The window can just be closed whenever it is not needed anymore. In case valid coordinates were entered into the TELESCOPE (next) form of the portal, Claude asks you, which set of coordinates to use. By clicking Yes, Claude uses the coordinates entered in the portal, while with No it uses the telescope’s current position (see fig. 2.6).
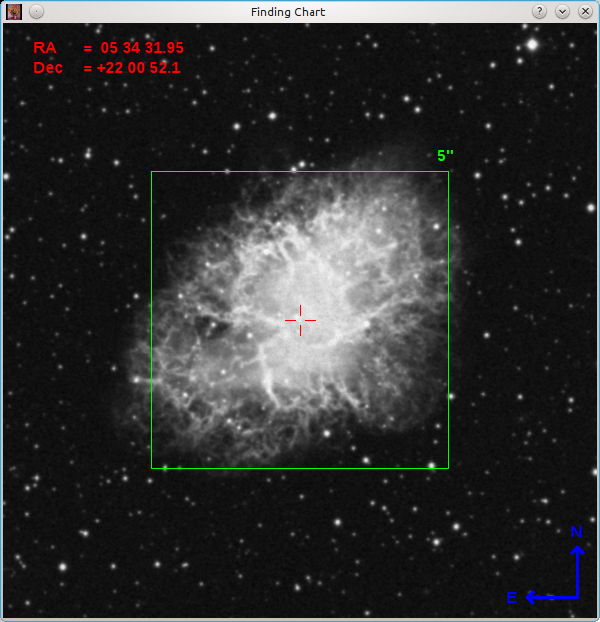
The DSS button works the same way as the Visibility button, but downloads an image for the given coordinates from the The STScI Digitized Sky Survey666http://archive.stsci.edu/cgi-bin/dss_form and displays it with some additional information related to Monet (see fig. 2.7(b)).
2.4.4 Status bar
On the very bottom of the window there are some additional status information about the telescope. On the far right the current time is shown – both the universal time (UT) and the local time (LT) at the location of the currently selected telescope.
The three coloured boxes on the left of it show the current status of the camera, the telescope and the dome (from left to right). A green background colour always indicates everything being okay. For example in fig. 2.5 you can see that camera and telescope are both idle and that the dome is still closed. Here Claude gives immediate feedback whenever an image is exposed or the telescope is moved. When exposing an image, the number of exposures left is shown together with an estimated time until all exposures are finished.
2.5 Navigating inside Claude


On the top of the Claude window you can see the navigation bar (see fig. 2.8). Nevertheless the icon on the far left has nothing to do with navigation, but allows you to log in to the portal or log out by just clicking. The button is enabled only if one of the Monet telescopes has been selected before. In case the you are logging in for the first time, you are asked for your username and password for the portal (see 2.9). Both are stored, so you do not have to enter your credentials again until the next restart of Claude.
The next seven buttons in the navigation bar (those between the vertical dashes) allow you to switch between the different pages provided by Claude. The current page is always indicated by a pushed button. The two buttons on the left lead to the Start page as described in section 2.2 and to the portal.
The other pages will be described in detail later: chapter 3 deals with Weather and Webcams, while chapter 4 describes how to handle images on the Images and Obslog pages. Acquisition (chapter 5) and FlatWizard (chapter 6) will also be explained in extra chapters of this manual.
Most of the pages are being enabled only after chosing a telescope site or even only after activating the telescope.
The next three buttons do not belong to another page, but open up new windows with (from left to right) the Scheduler (chapter 7), the options and some informations about Claude itself (both chapter 8).
The last button quits Claude.
Chapter 3 Telescope site information
3.1 Weather
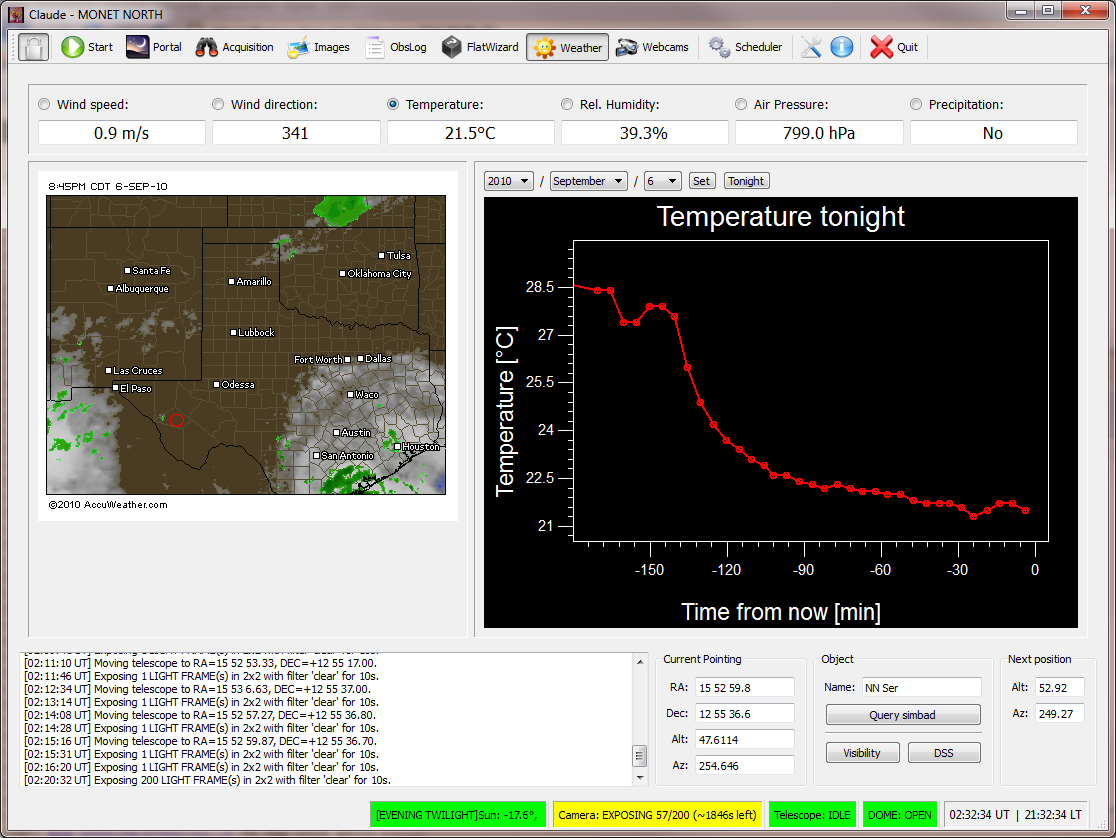
Claude automatically gathers weather information from the telescope site and displays it in a convenient way (see fig. 3.1). All the weather data is automatically stored on disk in the Claude directory that you specified in the options dialog (see chapter 8). There is one file for every night (from noon to noon) with a filename that contains the site location and the date of the starting day, e.g. Weather_MonetNorth_2010_11_30-01.log.
3.1.1 Weather map
A video containing a map with the cloud coverage and detected rain over the last couple of hours is updated in a regular interval and shown on the left of the page. The data comes from:
-
•
Monet/North: Accuweather111http://sirocco.accuweather.com/sat_mosaic_400x300_public/rs/isarTXW.gif.
-
•
Monet/South: not supported yet.
-
•
Monet/Sim: same as Monet/North.
On the Accuweather maps, clouds are indicated in white and rain in different shades of green, i.e. the greener the more rain.
3.1.2 Current weather
On the top of the page there is a list of current weather data. The data is being updated regularly from:
-
•
Monet/North: McDonald Observatory Current Weather222http://198.214.229.50/cgi-bin/obs_sup/latest_5min.cgi.
-
•
Monet/South: not supported yet.
-
•
Monet/Sim: same as Monet/North.
Next to the labels for the text boxes that show the actual numbers, there are radio boxes that control the plot that is described next.
3.1.3 Plot
Quite often the trend for e.g. the temperature or the humidity is of more interest than the current value itself. Therefore Claude plots the selected weather data for the last up to 180 minutes. The selection is done using the radio boxes at the top of the page as described in the last paragraph.
Instead of plotting the weather data of the last three hours, one can select another night from the drop-down lists above the plot. After selecting a year, month and day (of the start of the night) and clicking Set, Claude loads the corresponding file from disk and plots the data for the entire night. For this of course there must be a log file for that specific night, i.e. you must have been observing with Claude back then.
3.2 Webcams
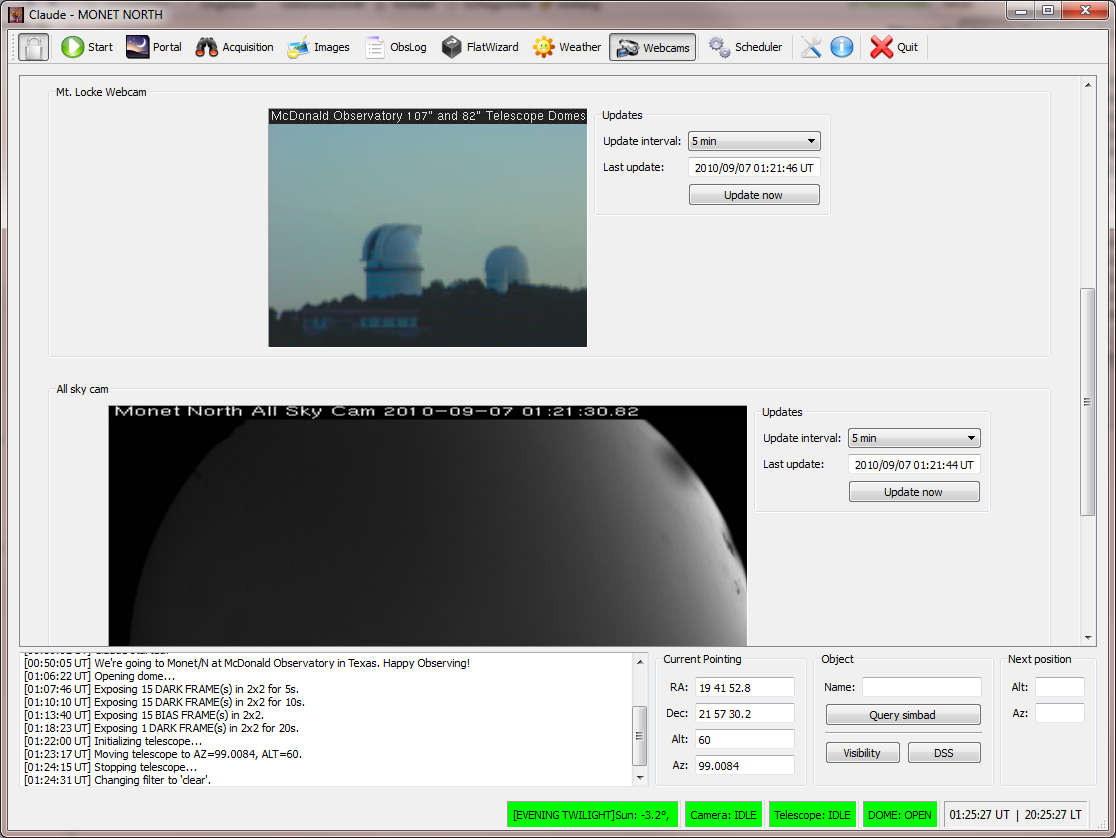
On the Webcams page a predefined list of webcam images are shown. For Monet/North these are:
- •
- •
-
•
Mt. Locke Webcam555http://mcdcam-dimm.as.utexas.edu/axis-cgi/jpg/image.cgi?resolution=320x240
-
•
All sky cam666http://http://198.214.229.115/jpg/1/image.jpg
For Monet/Sim the webcams are the same; Monet/South is not supported yet.
Next to the webcam images there is a listbox for changin the update behaviour of the images. The supported update intervals range from ’Never’ to ’30 min’, the default is ’15 min’. Usually during the night you can disable all webcams except the All sky cam, since they will be all black anyway.
The text box below shows the time of the last update and a click on Update now overrides the selected update interval and updates the webcam image immediately.
Chapter 4 Images
4.1 Online image summaries
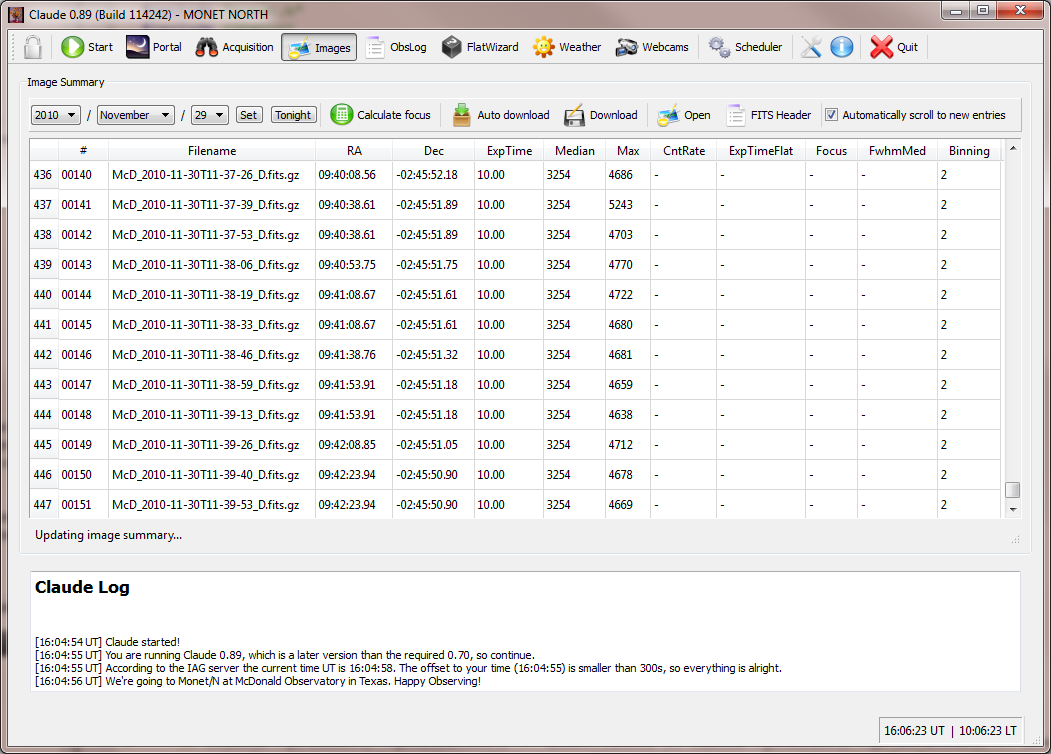
A list of images taken during a night is stored on servers at the telescope sites and are publicly available. See http://alfred.as.utexas.edu/~mhunder/nightlog_2010_12_09-10.log for an example for Monet/North. There also is a log available with only the latest fifteen images (http://alfred.as.utexas.edu/~mhunder/median_counts.txt), which is easier to handle during observations. Both log files share the same format. The columns are (from left to right):
-
•
A counting number (1) and the filename (2), which may be truncated due to the limited space in the log,
-
•
Right Ascension (3) and Declination (4) of the telescope during the exposure,
-
•
Exposure time (5),
-
•
median (6) and maximum (7) counts in image,
-
•
exposure time estimation for sky flats (9),
-
•
current focus value of telescope (10) and median (11), mean (12) and standard deviation (13) of the FWHMs of the stars in the image, as determined using SExtractor111http://www.astromatic.net/software/sextractor,
-
•
binning of the image (14) and airmass during the exposure (15).
4.2 List of images
Using Claude, manually keeping track of these logs is unnecessary. Instead, Claude can display the night logs of all previous nights on its Images page (see fig. 4.1). The list is updated automatically whenever a new image has been taken. However, this can take up to thirty seconds after an exposure is finished. Previous nights can be selected by chosing the date at the beginning of the night in the drop-down lists on the top of the page and clicking Set. Tonight always takes you back to the current night.
The automatic behaviour of Claude is to automatically scroll down to the latest entry in the list when a new image has been found. Since this can become quite annoying when looking through older images, it can be turned off using the check-box on the far right.
In the list multiple images can be selected at once following operating system standards. In Windows and Linux these would be for example:
-
•
Select one image, hold down SHIFT and select another one. All the images in between (including the selected ones) will be selected.
-
•
Hold down the CTRL key to select multiple images.
-
•
Click on an image without holding any key, so that only that image will be selected.
4.3 Telescope focus
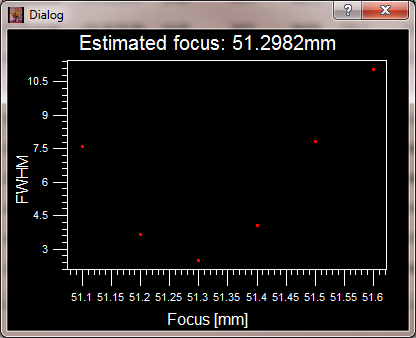
Although Claude can focus the telescope automatically (see section 7.4.3), one sometimes wants to calculate the focus manually from a set of images. This can be done by selecting all the images of a focus series and clicking on Calculate focus. Claude will show a plot of the FWHMs of the stars in the images over the focus value together with an estimated best focus values as determined from a hyperbolic fit (see fig. 4.2(a)).
4.4 Downloading images
Claude offers two methods for downloading images from the telescope sites: a manual and an automatic one.
-
•
Manual mode: Select a couple of images from the list and click Download. Claude will ask you for a directory to save the images to and start the download.
-
•
Automatic mode: The Auto download button behaves like a check-box, i.e. it triggers when clicked. To use this feature, a download directory must have been set (see chapter 8). Every new image will now be downloaded to this directory.
In the options dialog (see chapter 8) there also is an option for decompressing the gzipped images automatically into the download directory. If you are using a FITS viewer that cannot handle compressed images, this makes it much more comfortable to handle Monet images.
Also in the options you can set the maximum number of files to download simultaneously. To see which images are still in the queue to be downloaded, hit F8.
4.5 Opening an image
If a FITS viewer is defined (see chapter 8), clicking on Open after selecting an image from the list opens this viewer with the selected image.
4.6 FITS headers
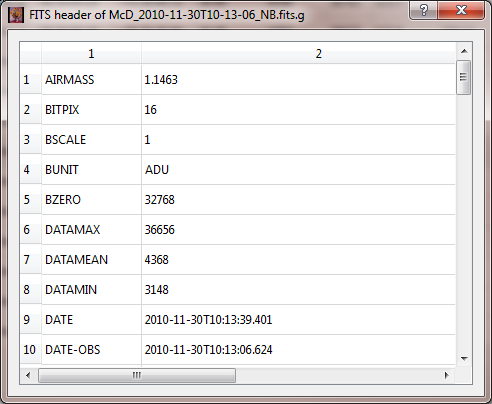
If you are interested in the FITS headers of an image, you can select it in the list and click on FITS Header. A new window will open up with all the key/value pairs in the file (see fig. 4.2(b)).
Chapter 5 Acquisition
5.1 Last image taken
When operating a telescope on site, it is usually easy to have a look at the last image taken. For remote telescopes like Monet this is quite different, since the portal page does not show it, so you have to download it from the server and open it in a FITS viewer manually.
But still this solution is far from perfect, since the images have to be downloaded over not-so-fast internet connections, so it can take a little longer than usual to be able to see an image just taken. To make life easier (and observations quicker), a preview image of the last image is provided on the server. For Monet/North e.g. this can be found at http://alfred.as.utexas.edu/~mhunder/preview.jpg. It is a downsized and compressed JPEG image, which is small enough in size to be downloaded in a very short amount of time.
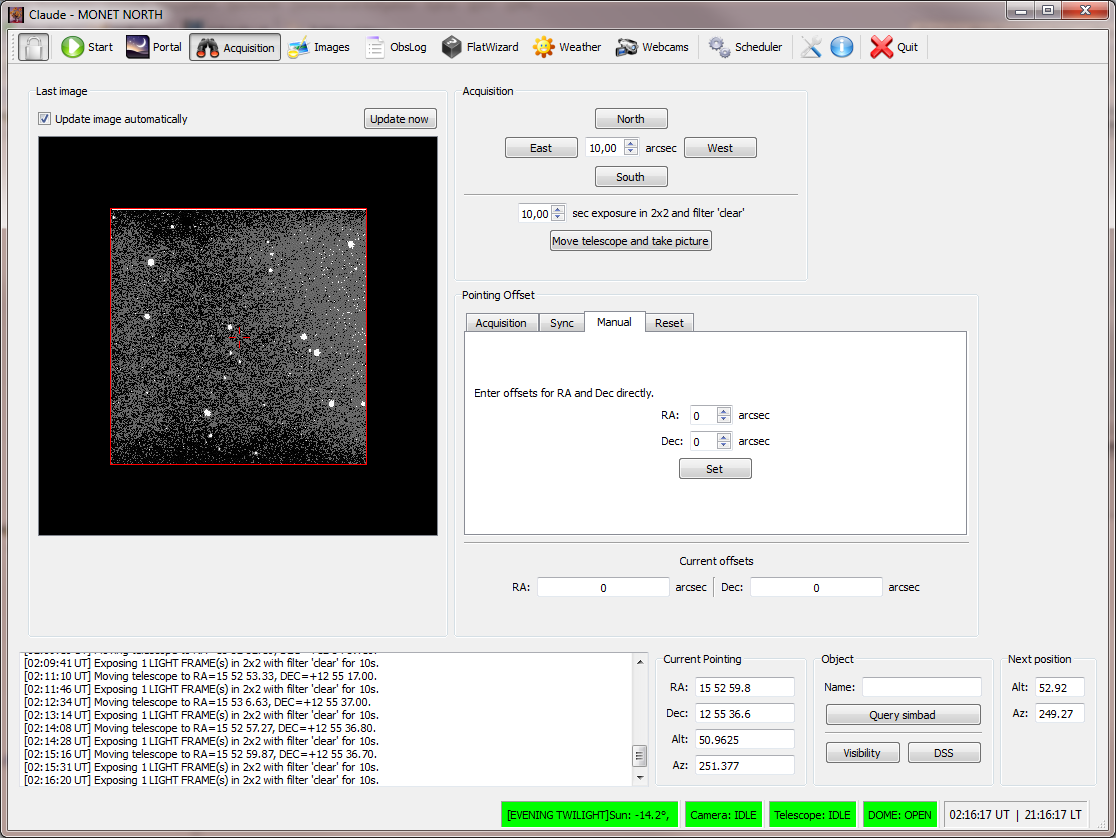
Claude can also download and display this image (see fig. 5.1). The check-box above the image controls, whether a new image is downloaded automatically or only on a click on the Update now button.
The image has the same orientation as the finding chart image downloaded from DSS (see section 2.4.3), so you can always compare both in order to get a feeling about where the telescope currently points to and where to move next.
5.2 Finding a target
Especially for extended targets, the coordinates provided by e.g. Simbad are often only a first guess for the final coordinates and need to be refined by taking pictures and moving the telescope subsequently over and over again. Using the preview image, you can of course use the Monet portal to move the telescope, but Claude offers a far more efficient way to do this.
Using the four buttons in the Acquisition box, you can move the red rectangle overlaying the preview image. The step size can be varied by the text box in the middle – the default is 10 arcseconds.
Once the red rectangle covers the area you are interested in, there are two possibilities offered by the two buttons below:
-
•
Move telescope: Just move the telescope. This is useful e.g. when doing time-series of an object that tends to move out of the field of view. In that case you can move the red rectangle to the desired position and click on Move telescope. As a result one or two images might be blurred, but the time-series can be continued without an interruption.
-
•
Move telescope & take picture: While still in the process of finding the best pointing for the telescope, you can use this button as a real Acquisition mode. The telescope is moved according to the red rectangle and an image in clear is taken with an exposure time given in the text box above.
5.3 Pointing offsets
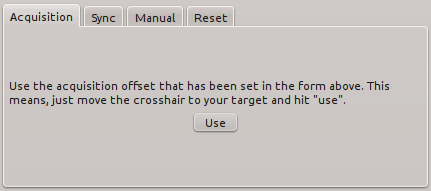
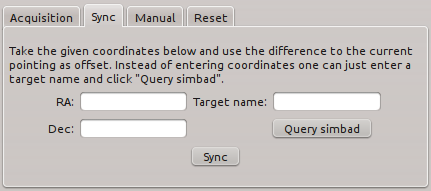
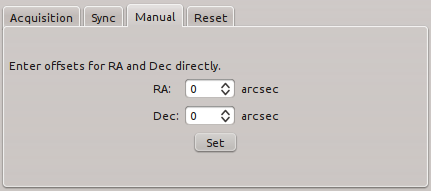
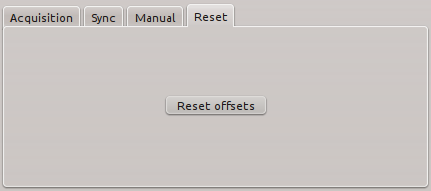
Sometimes it can happen that the poining of the Monet telescopes is not quite perfect. When operating the telescope manually this can be corrected by moving the telescope to its desired position before starting the observations, e.g. by using Claude’s Acquisiton mode (see last section). This becomes cumbersome when observing multiple targets and quite impossible when operating in automatic mode (see chapter 7).
If the targets to observe are all in a confined area on the sky, a constant pointing offset is a good approximation for the real correction for the pointing model. This works e.g. for observations within the galactic bulge.
Claude offers several ways to set a constant offset like this:
-
•
From acquisition: You can use the red rectangle from the acquisiton mode for a pointing offset. Therefore, after moving the rectangle, instead of moving the telescope, you can click the Use button here and the offset of the rectangle to its original position is used as pointing offset.
-
•
Synchronize with coordinates: After really moving the object, which already should be at the center of the preview image, to the center (i.e. under the red cross), you can enter its coordinates again here (or query Simbad for this purpose) and click on Sync. The difference between the actual and the given coordinates will be used as pointing offset.
-
•
Manual: Of course you can enter pointing offset for RA and Dec manually.
-
•
Reset: Resets both offsets to zero.
The current pointing offsets are shown at the bottom of the Pointing offset box (see fig. 5.1) and will be added to every pair of coordinates the telescope is moving to.
Chapter 6 Flat-field wizard
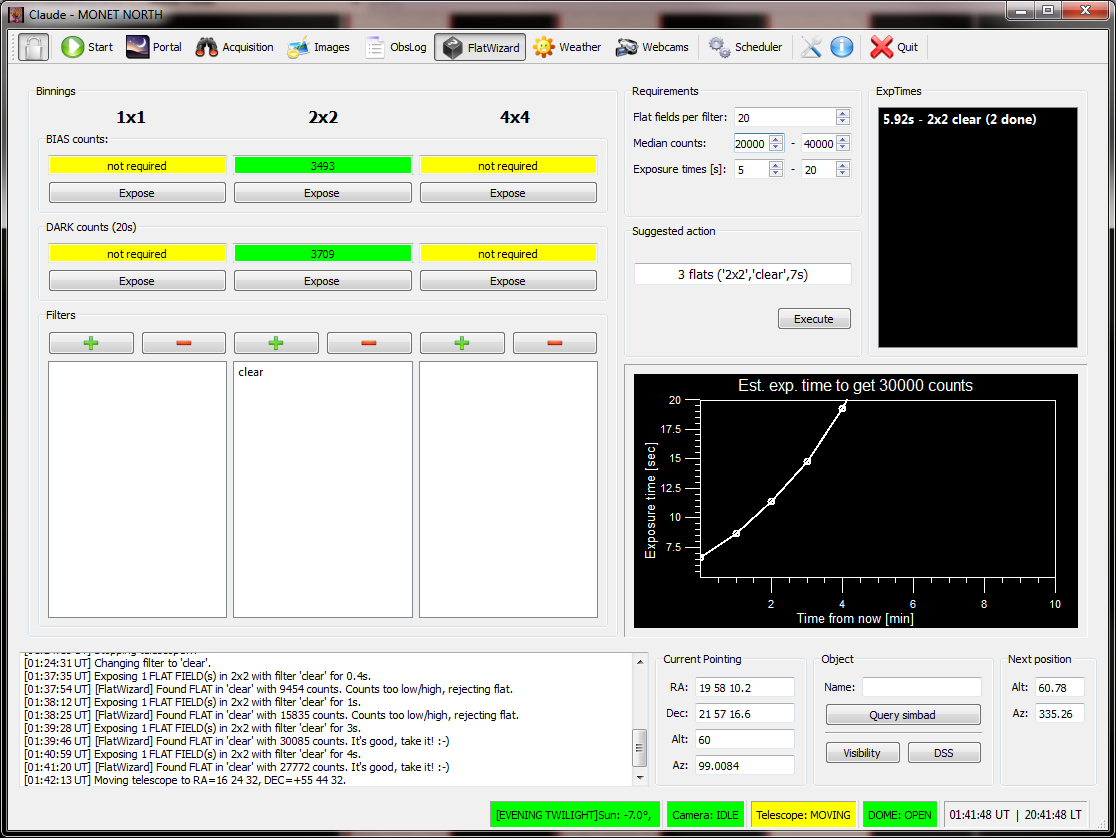
The flat-field wizard is still work in progress. The documentation for it will be added as soon as it is finished.
Chapter 7 Scheduler
7.1 Managing tasks
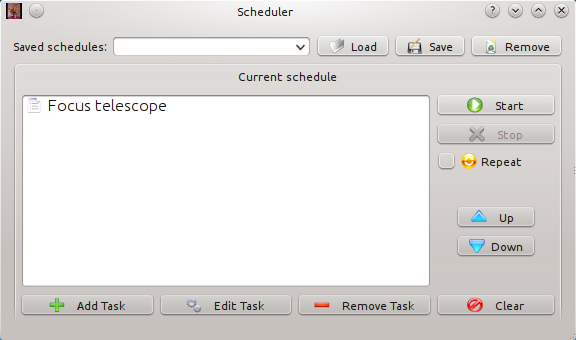
Claude offers a way for automating different tasks that do not need user interaction. This is not comparable to the planned robotic mode for the Monet telescopes, but can make an observer’s life easier in several cases. Single tasks (e.g. moving the telescope) can be run, but also a list of tasks can be defined (e.g. move telescope and take picture).
A new task can be added by clicking on Add task and selecting it from the popup menu. The options dialog for the selected task will show up and upon accept the task will be added to the list.
Once in a list, a task’s options dialog can be opened again by selecting it and clicking Edit task. A task can also be removed using the Remove task button. The whole schedule can be emptied with the Clear button. For changing the order of tasks, you can use the arrow buttons on the right, which move the selected task up or down in the list.
7.2 Running the scheduler
The Start button starts the scheduler with the selected task. If no task is selected, it starts with the first one in the list. All the tasks are run subsequently till the end of the list, unless the Repeat checkbox is checked. In that case, after finishing the last task, the scheduler starts again with the first task in the list. The scheduler can be stopped by clicking Stop.
ATTENTION: This button only stops the scheduler and not any running telescope or camera operation (e.g. moving telescope, taking picture)! Those have to be stopped manually in the portal!
While the scheduler is running, the list of tasks cannot be changed, i.e. no tasks can be added/removed/edited.
7.3 Loading and saving schedules
Schedules can be saved on disk and loaded again later. In order to save it, you have to provide a name in the textbox at the top and click Save. Afterwards the saved schedule will show up in the dropdown list associated with that textbox. Selecting it and clicking Load will load it again. Saved schedules can be removed by selecting them and using the Remove button.
7.4 Tasks
There are some pre-defined tasks that will be explained in detail in the following.
7.4.1 Move telescope
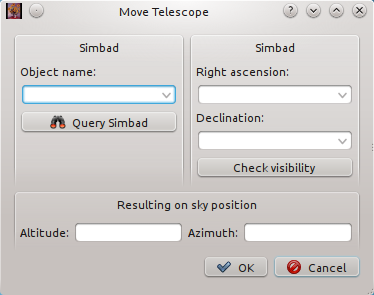
One of the most simple tasks just moves the telescope to a new RA/Dec position. Those coordinates can either be entered manually using the two textboxes on the right (see fig. 7.2), or an object’s name can be entered in the Simbad box on the left. A click on Query simbad will then let Claude try to fetch the object’s coordinates from Simbad. Both textboxes for RA and Dec also act as dropdown lists and will show all the coordinates that have previously been used.
At the bottom of the dialog, the current Alt/Az position of the given RA/Dec coordinates are shown. Please be aware, that Claude checks the coordinates again before the task is executed and will never move the telescope below an altitude of 15 degrees.
The Check visibility button will produce a visibility chart as described in section 2.4.3.
7.4.2 Expose image
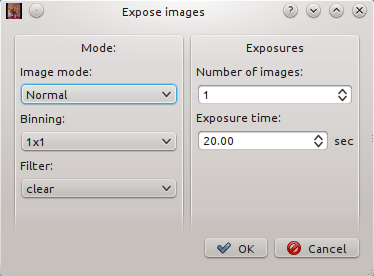
Another basic task allows to automate exposing images (see fig. 7.3). This is e.g. useful for taking RGB images. Instead of manually changing the filter and exposing images for every color, one can use a set of this tasks to accomplish it.
On the left, the image mode (’Normal’, ’Bias’, ’Dark’) can be changed together with the binning (currently 1x1, 2x2 and 4x4) and the filter (only for Normal frames!). Be aware that a filter change always takes some time, so a filter cycle of RRRGGGBBB is more efficient than RGBRGBRGB.
The number of images to expose and the exposure time (only for Normal and Dark frames!) can be edited on the right.
7.4.3 Focus telescope
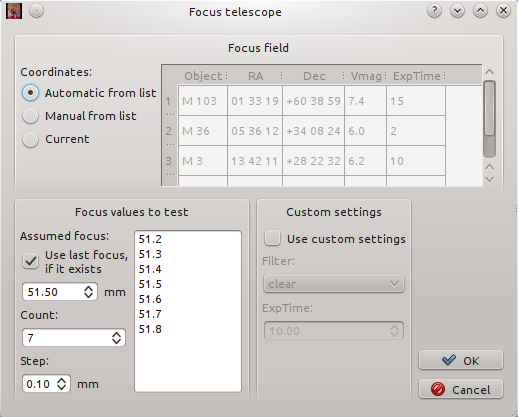
Focussing can be one of the most cumbersome and annyoing tasks when operating a telescope. Serendipitously Claude can do almost all the work necessary. See fig. 7.4 for the options dialog for Claude’s task to focus the telescope.
At first you have to select, which field on the sky to use. There is a list of pre-defined objects in the list on the upper right. The default setting is to let Claude decide automatically, which of these fields to use. It is always that object selected that is currently highest up in the sky. Alternatively you can select an object from the list manually. Of course it is also possible to focus on a completely different target (i.e. the science target). In that case you should move the telescope to that coordinate manually (or use the Move telescope task) and select Current from the options on the left.
In the box on the lower left the list of focus values that should be tested are defined. Claude automatically fills the Assumed focus with the focus value currently set, since that is presumably at least a good first guess. Of course the value can be edited manually. The checkbox above allows Claude to change this value again, when the task has been started. If a focus value has been determined before, that one is used. This is especially useful, if one wants to refocus the telescope multiple times during one night. Below a step size and the number of focus values to test can be changed. Experience showed that seven steps with a step size of 0.1mm yield good results. The listbox on the right shows a list of focus values that will be tested.
Usually Claude always focusses the telescope in the ’Clear’ filter. Since the focus is just a function of filter width, the values for the other filters can be calculated from the known widths. Alternatively one can force Claude to focus using a different filter and different exposure times. To do this, just check Use custom settings and edit the values manually.
When the task is run, the telescope is moved to a new target (if defined), steps through all the defined focus values and takes an image. Afterwars a hyperbola fit is done in order to calculate the best focus value. Beware that this task will never actually set the focus value. See the next task for this.
7.4.4 Set telescope focus
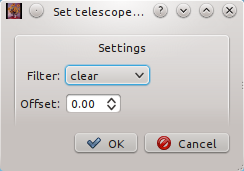
After determining the telescope focus (see last task), you usually wants to actually set it. In order to do this, the corresponding task asks for the used filter and an optional offset (see fig. 7.5).
As described in the last section, the telescope is always focussed using the ’Clear’ filter. This tasks needs to know the actual filter used in order to calculate the best focus value. In some cases it might be necessary to take unfocussed images (i.e. with targets too bright). For this an offset can be defined that will always be added the calculated focus value. A value of (i.e. no offset) always yields the best focus value to be set.
7.5 Writing your own task
It is possible to write your own tasks using a Javascript-like language. If you are interested in this, please contact the author for further instructions.
Chapter 8 Options
8.1 Language
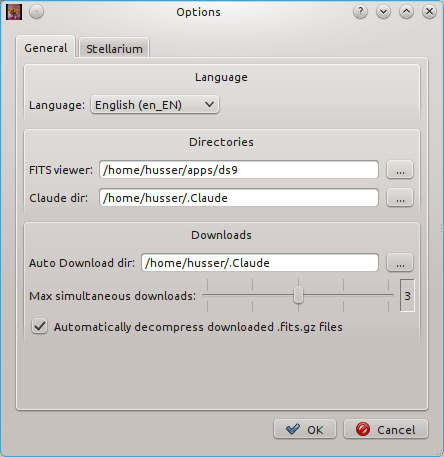
Claude’s default language is English, nevertheless that can be changed using Claude’s options dialog (see fig. 8.1), which can be accessed by clicking the tool shaped icon in the tool bar.
Currently Claude provides only one more language: German. If anyone is interested in creating translations for other languages, please contact the author.
8.2 Directories
Claude needs one directory, where it can write to in order to store logs, schedules and other stuff. This directory is usually refereed to as Claude dir. It is absolutely necessary and Claude will not run properly without it being set.
Furthermore you can set the path to a FITS viewer (like DS9, ImageJ, …) here. This is then used to open files from the image summary (see chapter 4).
8.3 Downloads
For using the Auto download feature of the image summary, you also need to set the Auto download dir in the options dialog. This directory is where all the images are downloaded to automatically.
Since both Monet/North and Monet/South do not have stunningly fast internet connections, it is always a good idea to limit the maximum number of simultaneous image downloads. This can be done using the slider provided in the options dialog. If more than the given number of downloads are requested, they are put in a queue, which can be displayed by pressing the F8 key.
In order to limit the amount of data that needs to be transferred, the images are stored on the server in a compressed archive. The checkbox at the bottom lets Claude decompress those archives automatically after the download.
8.4 Stellarium
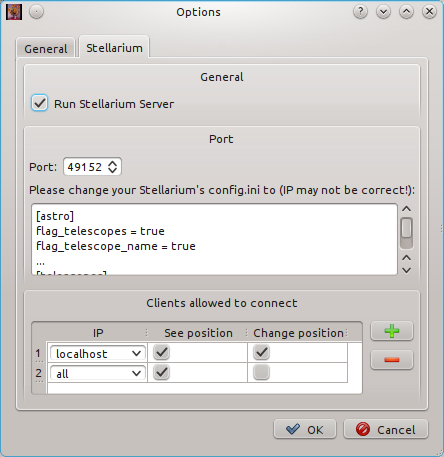
A feature especially interesting for schools and groups of students is the possibility of controlling Claude (and therefore the Monet telescopes) remotely using Stellarium111http://www.stellarium.org/, which is a free open source planetarium available for Windows, Linux and MacOS.
When using this feature, Stellarium always shows the current position of the connected Monet telescope and even allows its user to move the telescope by clicking on an object. Please see the Stellarium manual for further details.
In order to use Claude’s Stellarium server, it must be activated in the options dialog (see fig. 8.2). Futhermore a TCP port must be specified, which is used to communicate with Stellarium. If you do not know, what this is, just do not touch it! For older versions of Stellarium a configuration file needed to be changed and the lines in the text box below added. For more recent versions this can be done using Stellarium’s Remote plugin. Please see the manual for details.
Since we do not want to allow every Stellarium client in the local network to connect to Claude, a list of allowed clients can be edited below. The default setting is that every Stellarium client can see the current position of the Monet telescope (whatever, no harm done), but only a Stellarium running on the same machine as Claude can request the telescope to move. This options probably need to be adapted in order fit the needs of a work group using this feature. It might e.g. be a good idea to run Claude on one computer and use another one to control it via Stellarium.
Whenever Claude receives a request from one of the Stellarium clients to move the telescope, it asks for confirmation before it actually does anything. This way nobody can move the telescope without approval of the observer that runs Claude.